
I think it was late last year, I wrote a post all about my at home gel manicure. The comments that I received on that post were amazing. People were saying that I was the queen of the at home manicure. To say that I was incredibly proud would be a rather big understatement. However, after doing my own gel manicure at home for almost a decade, things quickly changed. Almost overnight, I developed an allergic reaction to my gel nail products. For a long time, I didn’t know what was causing the reaction, but after much trial and error, it was the nail products. Since then, I have tried so many different brands and caused much pain, but I now once again have a good routine and products that work for me. Because of this, I am going to share my updated and simple at home manicure.
Step 1 – Prep
As always, the first step has to be the prep. I am pretty sure that I have mentioned before that this used to be the step that I neglected. Then, I found that as soon as I began to actually prep my nails properly, my nails would last so much longer. I begin by pushing back my cuticles and trimming if required. I then gently buff the top of the nail to create a surface which has some grit. Then, I go in with a dehydrator and a nail primer. This combination is a winner for me and makes my nails last so much longer. It is usually during this step that I will decide if I am going for short or nail extensions and apply tips if required.
Step 2 – Build
The next step in my simple at home manicure is the building of the nail. Whether I am doing this on top of my natural nail or adding extensions, the build is so important. No matter what I do, my nails are very thin and fragile. They split very easily, so having a good builder on them is so important to me. I usually add two good layers and try to build an apex on my nail to give them a more natural look. I am not going to lie; this took some practice. Back in the day, I would have thick and clumpy nails. I did get there in the end, but it took patience!
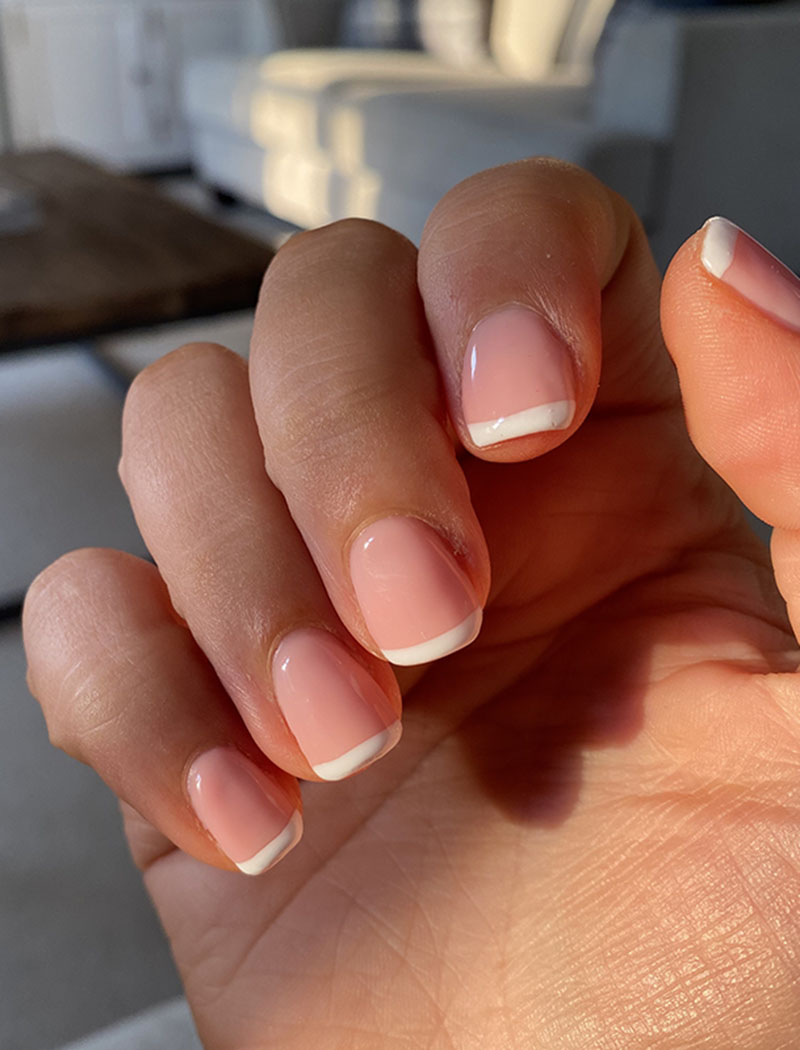
Step 3 – Paint
Once my base has been built to give me the strength that I need, I move onto polish. I would say that 99% of the time, I go for classic French. To be honest, my hands are probably my biggest insecurity. I feel like they are rather large for my size, so having a simple French doesn’t draw attention and it lengthens my hands rather than cuts them off with a full nail polish. I go for a semi-sheer pink base coat and then I take white on a detail brush to make sure that I get a tight line to the tip of my finger. If I ever feel daring, I might try to add a little nail art, but that is rather rare for me!
Step 4 – Topcoat
I feel like it really goes without saying that as part of my simple at home manicure there is a topcoat involved. Once my polish is cured, I take my Nails by Annabel Non-Wipe Topcoat and add a generous amount. The first time I used this, I was sceptical. After using the Gel Bottle Inc one, I felt like this didn’t have the same amount of shine and it felt tacky. However, I have since learnt that I just need to cure it for almost twice as long as the Gel Bottle version. It isn’t the end of the world; it is just worth noting. Now, they look super shiny and luxe now that they are 100% set in place.
Step 5 – Finishing
Once the topcoat is set, I like to take some time to really clean and rehydrate my hands. This step for me really started when my allergy had peaked. Some people put online that it can be dust and residue left on the skin. Now, when I have finished with my nails, I take myself into my bathroom and clean my hands. Because I don’t want to expose my gels to water straight away, I lightly wet a nail brush and just go around each of the fingers. I then take my Clarins Restorative Hand Cream and lather my hands up to add in the hydration lost from the lamp.
I hope that you enjoyed seeing my simple at home manicure. None of the steps in this routine are ground-breaking, but it does work well. When I take these steps, my nails stay on for a minimum of a fortnight. D  epending on how much I do during that time. Over the years, I have wondered if I should treat myself to the salon experience for my nails, but the truth is that I am far too anti-social. I can’t bring myself to go and make small talk to somebody for a couple of hours once I am done with work. My simple at home manicure works well for me and I am not planning on changing anything soon. If like me, you cannot have standard gel polishes due to allergy, I have been loving the Nails by Annabel and CJP Nail Systems.